Adios, Adieu, Goodbye for Now, “Pear, Blueberry Jam with St. Germain”

DSC_1633

September crept in right on top of the last days of August…it has been tropical…. rainy and humid and hot, windy with bouts of unusually cool days scattered in between. Most of the local fruit is gone…the peaches, berries…plums and now my pears….adieu, adios and goodbye until next year sweet ones.

In the early dark days of fall and winter I will have my consolations on a shelf in my kitchen. A few jars of preserves…peach and plum. Jars of jam…pear and blueberry with a splash of St. Germain will be there, ready to comfort me.

photo 1

Ripe and Ready.

photo 1

The evening before I made this jam I cored, peeled and roughly chopped the pears and tossed them in a bowl with some raw sugar and lemon juice, covered the bowl and refrigerated the fruit overnight.  The sugar and lemon juice help to pull some of the juices from the fruit, breaking the fruit down naturally which shortens the cooking process.

DSC_1327

Do you know about “Pomona’s Universal Pectin”? I like to use this brand as the recipes for  jams, jellies & preserves can be made with less sugar. I do not like cloying sweet preserved fruit so this pectin is just right. The instructions are easy to follow and there are plenty of recipes inside the package. It is preservative free, kosher, vegan, gluten-free and non-gmo. I usually buy it a Whole Foods, but it is available online at their site as well. DSC_1363

I had la few cartons of fresh blueberries left over from a photo shoot so I tossed them in with the peeled and chunked pears. The blueberries gave the finished jam a lovely soft color. A generous splash of St. Germain elderflower liqueur added another layer of goodness.

DSC_1339

You always want to “test” your jam or jelly after cooking to make sure it “sets up”. I do this by spooning some of the mixture out onto a chilled plate. Leave it to sit a few minutes and then check the consistency. This batch “jammed” to perfection.

DSC_1334

Every time I begin to can I feel like a novice….no matter how many times I have done it. This is where I am my most careful-self in the kitchen. I read the instructions, reread and double-check before starting. I gather all my canning supplies, pans, jars, ladles before hand and get everything cleaned, sterilized & all lined up ready to go. My best advice is just do what the recipe & canning instructions say…verbatim…all will be well.

DSC_1343

DSC_1353

DSC_1638

Pears, Blueberries Jam with St. Germain

  • Servings: 6-8 half pints
  • Print

photo 1DSC_1334DSC_1638

Ingredients:

  • 6 cups cored, peeled & chopped pears
  • 3 cups blueberries
  • 2 cups raw/turbinado sugar
  • 1/2 cup Elderflower Liqueur/St. Germain
  • juice of 2 lemons
  • Pkg of Pomona’s Universal Pectin (or other pectin if you prefer, most have easy, simple canning instructions inside the box. I used the directions for canning pears.
  • Equipment: clean 1/2 pint glass canning jars & lids, canning equipment (or if you prefer you can do this jam for the freezer…no hot water bath canning processing required.)

Directions:

  1. The night before you plan to can, mix the pears, sugar & lemon juice in a mixing bowl, cover & refrigerate overnight.
  2. The next day put the pear mixture in a large saucepan. Add 1 cup of water. Bring to a low boil. Add the pectin according to the package directions, turn stove to low simmer. Cook for about 30 minutes stirring often.
  3. The last 10 minutes of cook time add the blueberries & St. Germain. Stir gently.
  4. While fruit is cooking, wash & rinse canning jars in hot water. Set aside to drain on a very clean dish towel. Use new lids & rings. Put these in a pan of hot water until ready to use on low heat. There are many, many methods for hot water bath canning  so use one that works for you.
  5. When jam is almost finished cooking test the jell by spooning some jam mixture onto a chilled saucer, refrigerate for a few minutes. Test to see if the jam is the consistency you prefer. If not continue cooking another 15 minutes.  Remove from heat.
  6. Fill glass jars with hot jam mixture to within 1/4 inch from the top of the glass rim for hot water bath canning process, 1/2 inch for freezer jam. Wipe each jar rim clean before adding lids. When all jars are filled & wiped clean, top with lid and ring.
  7. For hot water bath place filled jars into your canner rack, lower into the canning pan, cover jars with warm water covering by 1 inch. Bring to a boil, process for 10-15 minutes. Turn heat off. Raise jar rack out of the water bath & place jars on a cooling rack. As jam cools you should hear a soft “pop” as each jar seals. If some jars do not seal then refrigerate to use immediately.
  8. For freezer jam after #6 let jars cool down completely & store in the freezer until ready to eat. Remove jars from freezer a few hours before using.

A Toast to the Holidays / “Poire et Jacques, Y’all”

” Poire et Jacques, Y’all”

Thanksgiving really began at our house one week before November 24th. Thursday, November 18th to be exact.

The Third Thursday Potluck was that evening &  called for something special to take along as it was the last Third Thursday Potluck of 2011. A special cocktail/tonic has become my regular potluck dish. I have made many cocktails to take to this wonderful monthly dinner hosted by my friend and fellow blogger Nancy Vienneau (www.goodfoodmatters.com) and my friend, Gigi Gaskins owner and fabulous hat maker at “HatWRKS” (check it out on Facebook).

I wanted this holiday cocktail to contain ingredients that represent my geographical place as well as a Southern based liquor & be wintry. This recipe, which is a Toast to the Holidays and an Ode to Winter, is one I hope you will  try. On warmer fall days like we have been having here in Nashville it was perfect over ice, but as the days become chillier it is very cozy served hot and I am sure it has medicinal properties that will ward off colds & flu during the holidays. I could not think of a name for my concoction….Wouter came up with the perfect name don’t you think?

Ingredients: (for about 2 quarts for a party)

6 cups Pear Cider

2 cups Jack Daniels Tennessee Honey Whiskey

1 cup Pear Liqueur

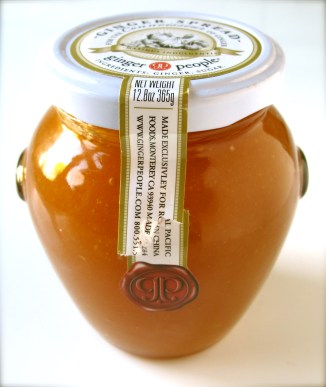
2 TBSP Ginger Jam or Preserves

Mix all ingredients together in a large container.

Add one or two whole peeled winter pears to a pitcher. Pour cocktail mixture over pears and chill until ready to serve. (Later these pears will make a very nice dessert)

You can make this cocktail ahead of time and keep refrigerated over the holidays to have on hand ready to serve when the moment calls for a relaxing drink with friends. Add a few crispy pear slices and a small teaspoon of ginger jam to each glass whether serving cold or hot.

The remainder of my week between the Third Thursday &  the Fourth Thursday of November was a bit of a blur. This was not due to imbibing to much Poire Jacques by the way!

There were calls to work out-of-town, calls to work in town, shoots booked, cancelled and rebooked, recipe development & testing to be done, a food video shoot in my  kitchen on Wednesday so by Thanksgiving day I had already cooked & styled 2 pork loins with fruit stuffing, baked  some yummy chocolate cookies, Wisconsin cherry scones & cupcakes with a buttercream frosting, pie crusts, pies, roasted red bell peppers and a garden greens saute, and that is just part of the list. We had bid happy holidays to our grown children going to Wisconsin & Knoxville to visit relatives and taken in our grandson’s Jack Russell, Bill to spend a few days with our dog Ella.

Our Thanksgiving was a day of walking dogs in crunchy, colorful fall leaves, watching four “Boardwalk Empire’s” back-to-back, going to see “Descendents” at the movies, stopping by to see the progress on an inn our friends John and Liz are getting ready to open here in Nashville, eating big bowls of Perciatelli with MeatBalls & Red Sauce along with some red wine and being thankful for all of this and more.

“A Quick Sweet/Savory Breakfast Frittata with Pears & Blackberries” (for the folks working on the video at my house to enjoy)

Ingredients:

One sheet of puff pastry slightly thawed

4 slices of good sharp white cheddar

2 cups thinly sliced hard pears

1 cup fresh blackberries

4 eggs whisked with 1/2 cup cream, 4 ounces softened cream cheese & 1 tbsp raw or brown sugar

Extra raw sugar for  sprinkling on top

Maple syrup for drizzling on top of servings

Directions:

Turn oven to 375 degrees. Butter a 10 inch cast iron skillet. Line skillet with sheet of puff pastry.

Arrange cheddar slices over bottom of pastry & top with pear slices. Pour egg-cream mixture over pear slices and sprinkle with blackberries & raw sugar.

Bake until puffy & golden brown and until eggs are set in the middle. Remove from oven & let sit for a few minutes before serving. Sprinkle with a bit more sugar. Drizzle with maple syrup.

The crispy-flakiness of the puff pastry along with the naturally sweetness of the fruit, the savory egg & cheddar cheese topped with a bit of sweet maple syrup & the crunch of raw sugar makes for the perfect quick breakfast that is not cloying sweet nor too savory.

“A Little Seasonal Gallery of Fun”

Francis Ann enjoys a Poire Jacques.
Tammy & George’s Kitchen Clock
Melted Cheese-us on Burger
Not sure of the connection?
Table Talk Pie Pan
Bill
Early morning kitchen board.
Ella
…..or Else!

“The Last Pear(s)”

“after the fall”

I was told by a friend, Abby,  recently,  “You have this thing about pears” and it is true…I love the juicy taste, the sexy shape, the variety of colors & textures, how they work with both sweet and savory recipes…they complement, they enhance and they stand alone beautifully. It is mid-November, Winter in Nashville and I just picked the last pears from a tree on my street. Many from this tree have been food for the birds, many have fallen on the ground to beautifully rot, but I have the last of the edible pears and that is all there will be for this year.

“Dried Pears for Winter Dishes”

1. Wash & dry pears. Line baking sheets with parchment paper. Set oven temperature to 200 degrees.

2. Cut whole pears, stems, core and all into thin slices using a “mandolin” or sharp knife. I used one of my three mandolins to slice these pears for drying. This one is the most simple and inexpensive one I own, but works the best. You can pick up a mandolin at most shops that sell cooking supplies.

3. Lay thin pear slices out flat on parchment paper.

4. As you can see I put multiple trays of pears to dry in my oven at the same time by stacking them askew so the air could circulate throughout all the trays during the drying time. Turn your oven timer to 7 or 8 hours and walk away. During this drying time you might want to check pears, turning them over once. This is not necessary, but something I like to do. After this day of drying, check pears, if not dried out completely then leave in the oven for an hour or so more. Whether you have a dry day or rainy day will often affect the pears so keep this in mind. When pears are dried enough I just turn the oven off, leaving pears inside while oven is cooling down.

….perfectly dried pears…

5. Store dried pear slices in a container with an airtight lid for later use in your favorite recipes.

“The Last Pear Tart In a Cornmeal Crust”

Left photo: I really like these pre-made frozen “Vicolo” organic corn meal pizza crusts for quick and easy savory or sweet tarts. There is something about the idea of combining yellow cornmeal, pears & brown sugar that really appeals to my winter palate so I created “The Last Pear Tart” with these and a few other simple ingredients.

Right Photo Ingredients : One pre-made Vicolo, or other brand, corn meal crust; 1/2 cup plain yogurt; 2 eggs, 2 to 3 tbsp brown sugar; 3 or 4 thinly sliced, peeled, cored pears.

To Make: Preheat oven to 375 degrees.                                                                                                                       1. Whisk together the yogurt, eggs & brown sugar.                                                                       2. Arrange pear slices over thawed corn meal crust and pour yogurt                                            mixture over pears letting it run up under and around all pear slices.                                   3. Place filled crust on a baking sheet and pop into the oven. Bake for                                       about 20 minutes or until tart is golden brown, pears are softened and                                   edges start to caramelize. Remove tart from oven. Let cool a bit                before serving cut into wedges.

“….the last pear…..”