Happy New Year Cheese Crackers E. A. T. #26

While noodling around on the internet this week looking for inspiration for a “nosh of note”, I ran across a recipe for “Parmesan Cream Crackers” by Mark Bittman that was published in the New York Times cooking section a few years ago.  Homemade crackers would certainly qualify as a “nosh of note” wouldn’t they? Bittman’s basic recipe has just a few ingredients and from start to finish, 25 minutes/ I had a pan of freshly baked crackers. What could be easier than that?

Encouraged I took the basic recipe and ran with it…first batch I topped with toasted sesame seeds….which thankfully you can now purchase already toasted. Would you like to know how many sesame seeds I have burned up toasting them myself? Thousands I would guess.

The simple dough needs to be rolled out thinly and cut/scored before baking. The second batch I added fresh thyme leaves and red pepper flakes for a bit of heat.

On a roll I whipped up a few other batches using various toss-ins and toppings such as crunchy sea salt, black pepper, espresso cocoa sea salt….

….bittersweet chocolate, chopped pistachios, orange peel and crunchy raw sugar.

Two hours later sheet pans of savory aromatic crackers covered the kitchen counters, ready to accompany a cheese platter along with a few bottles of bubbly for a New Year’s Eve with good, long-time friends…it was as Easy as This.

Note: “Nosh of note” was a quote from my friend, Nancy Vienneau, within an invite to a New Years Eve gathering at her home. Check out her blog at “Good Food Matters”.

Note: You can find the original recipe for “Parmesan Cheese Crackers” by Mark Bittman here..

Happy New Year Cheese Crackers

  • Difficulty: easyasthis
  • Print

For basic Parmesan Cheese Crackers:

  • 1 cup all-purpose flour, plus extra for rolling out
  • 1/2 teaspoon salt
  • 1/2 cup finely grated Parmesan cheese
  • 4 tablespoons butter
  • 1/4 cup cream + more as needed to make dough

For “Toss-ins and Toppings” that I used:

  • toasted sesame seeds
  • thyme leaves and pepper flakes
  • espresso-cocoa sea salt mixture
  • chopped pistachios and orange zest with black pepper
  • bittersweet chocolate, espresso powder, raw sugar and cinnamon
  • any number of other ideas pop into my head…pecans, walnuts, green tea, cayenne, any herbs, cardamom, lavender and lemon zest…use what you might have, what you like, and experiment.

Directions:

  1. Preheat oven to 400 degrees. Line baking sheets with parchment paper.
  2. To a food processor add flour, salt, Parmesan cheese and butter. Pulse to combine.
  3. If you choose to add any “toss ins” do so now, although the original recipe is fantastic as is.
  4. After adding “toss ins”…drizzle in cream while processor is running until a dough forms. If need be, add a wee bit more cream. Dough should be smooth and silky and not at all sticky.
  5. Roll dough out until thin, but workable, on lightly floured surface. Add flour as needed. Transfer dough to parchment lined baking sheet. (You can also simply roll the dough out on a sheet of lightly floured parchment and then transfer to sheet pans to save a step.
  6. Here is where the “toppings” part comes in. Sprinkle on top and gently press into surface of dough.
  7. Using a pastry wheel or knife cut/score dough so you can break into individual crackers after baking.
  8. Bake until golden, light browned…for about 10-13 minutes depending on your oven. Cool on wire rack. You can serve these crackers warm or at room temperature and they can be stored in air tight containers for a few days. They are great with a bowl of soup or as dippers.

teresablackburnfoodstyling.com

recipe adapted from a recipe by Mark Bittman published in the New York Times.


E.A.T. # 25 Soup Lovers Leftover-Turkey Noodle Soup

I love soup…cold soup in the summer, chili at the first sign of fall and hearty hot soups all winter long. Soups make me feel cozy and safe. Healthy and homey.

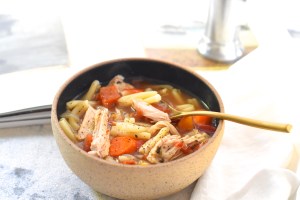
It’s as easy as this to make a “soup” lunch or dinner in under an hour. Leftover holiday turkey meat, some vegetables, noodles, broth and herbs are all you need. Gruyere cheese melted on slices of bread round out the meal.

Any noodles you like will work fine. Long spaghetti noodles, or macaroni or you can even break up a few lasagna noodles to toss into the pot. I used some Strozzapreti I picked up at Eataly the last time I was in Chicago. These noodles, somewhat like Cavatelli,  are short, sturdy, rolled and are good for holding juices and sauce.

A leftover over roasted turkey breast from Thanksgiving, a few cans of tomatoes, carrots and onions, broth and herbs are the other basic ingredients.

One of my favorite winter lunches is enjoying a good bowl of hot soup while catching up on my reading or looking at art books or magazines. We all need some time to be quiet and alone,  letting our thoughts wander and weave about randomly. I find this is when I work things out in my head or absorb and develop new ideas for projects. Try it.

This is more of an “idea of soup” than an actual “must follow” recipe. Use what you like and what you have on hand. No rules, just tasty ingredients. It really is as Easy as This….Stay warm.

Soup Lovers Leftover-Turkey Noodle Soup

  • Servings: 8
  • Difficulty: very easy
  • Print

Ingredients:

  • 2-4 cups chopped or shredded turkey or chicken meat
  • a splash of olive oil
  • 1 small onion, chopped
  • 4 carrots, peeled and chopped or sliced
  • 3 cans fire-roasted tomatoes with juice
  • 4 cups low sodium/fat chicken broth
  • fresh thyme leaves or any herbs you prefer
  • Salt and freshly ground black pepper to taste
  • 2 cups short pasta noodles such as cavatelli, macaroni or strozzapretti

Directions:

  1. Cook the pasta noodles very al dente in a pot of salted water, drain and set aside.
  2. Add a splash of olive oil to a soup pot and heat over medium high heat. Toss into the pot the chopped  onion and carrots. Cook until onions are transparent.
  3. To the pot add the tomatoes and chicken broth, turkey or chicken meat, fresh thyme leaves and other herbs, salt and black pepper. Bring to a low boil. Taste and adjust seasoning to your liking.
  4. Right before serving add the al dente pasta noodles to the hot soup. Serve with slices of good bread toasted with Gruyere cheese on top.

Stay cozy and warm.

teresablackburnfoodstyling.com    foodonfifth.com


Cara Cara and Blood Orange Salad E.A.T #23

DSC_0331

Blood Orange, Cara Cara, Satsuma, Tangerine, Navel, Little Cuties, Mandarins by any other name would still taste as sweet or tangy, fresh or juicy.  It is February and peak season for all manner of citrus. Some are easy to peel, some are seedless, some have smooth skins and some are more pithy.

My favorite winter centerpiece is a simple bowl of beautiful oranges. They glow in the late evening light.

DSC_0368

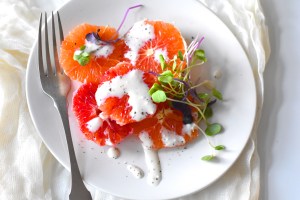
Lovely slices of blood oranges and cara cara oranges ready for a salad. Simple and clean.

DSC_0329

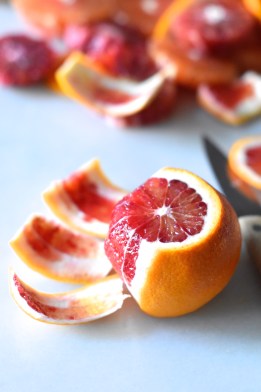
Here are four “easy-as-this”  steps for making perfect oranges slices. This method is sometimes called “supreming” and it is just a technique in which you cut away the pith/membrane from the fruit before slicing or sectioning.

DSC_0354DSC_0356

DSC_0358DSC_0361

Pretty easy huh? Slices piled on a salad plate topped with radish sprouts and a drizzle of dressing. It really is as “easy as this”.

DSC_0340

Cara Cara and Blood Orange Salad

  • Difficulty: extremelyeasy
  • Print

DSC_0340

Ingredients:

  • Ripe, firm, juicy oranges/citrus – for each salad serving use 2 different types. I used cara cara and blood oranges. For 4 servings you need  6-8 oranges, for 6 you need 10-12 oranges
  • fresh sprouts – radish are great, but pea sprouts or sunflower sprouts are good too
  • sea salt and freshly ground black pepper
  • dressing to drizzle – creamy or vinaigrette.

Directions:

  1. “Supreme” your oranges/citrus and cut into slices. Remove any seeds. Here is how:DSC_0354DSC_0356DSC_0358DSC_0361
  2. Divide slices between serving plates and season with salt & pepper.
  3. Scatter fresh sprouts over the orange slices.
  4. Cover and chill if not eating immediately.
  5. Drizzle with dressing right before serving.

Teresa Blackburn      www.teresablackburnfoodstyling.com


Maple Kumquat Marmalade E.A.T. #22

dsc_0401

Sometimes I see an ad for a new gadget or appliance that makes me stop and wonder. Wonder why? Wonder at the desperation to come up with the newest thing to sell to people just “because”. The novelty seems to be the thing in itself.

There is an ad for a refrigerator that is showing up everywhere right now that has a camera(s) inside that connects to your phone.  If you have one of these you can always know what you have, or do not have, on hand to eat. Personally this is just too much information for me. One thing I wonder is if when you open this refrigerator does it take pics of you as well? Could this be another social media app- InstaRefrigerator? Has it come to this? You heard it here first!

dsc_0345

Most days I just open the door of my refrigerator and improvise. Improvised recipes can be the best. Finding “hidden food” in the back of the fridge might even lead to a blog post. I happily found a few cartons of kumquats at the back of my “no-camera” fridge a few days ago. I bought them over the holidays, forgot about them, rediscovered them and made marmalade. Part of the fun was the unexpected discovery of these orange orbs still just as plump as the day I bought them.

A marmalade with three ingredients…seeded kumquats, maple syrup and a pinch of sea salt. It’s as “easy-as-this”.

dsc_0387

Seeding is simple. Cut kumquats in half and seed with a spoon or your fingers. It takes a little time, but can be meditative.

dsc_0392

Thick syrup, softened sweet-tart kumquat marmalade smeared on hearty crusty bread toasted, or not!

dsc_0398

Maple Kumquat Marmalade

dsc_0398

Ingredients:

  • 3 pints of fresh kumquats, rinsed, cut in half and seeded
  • 1 cup real maple syrup
  • pinch of sea salt

Directions:

  1. Place kumquats and maple syrup in non-reactive pan and bring to a low boil. Turn heat to simmer, stirring often. Cook for about 30 minutes or until kumquats are softened to marmalade consistency and juice has thickened. If necessary add a bit of water to mixture as it cooks down.
  2. Ladle marmalade into glass jars. Store chilled for up to 2 months.

Teresa Blackburn     http://www.teresablackburnfoodstyling.com

Homemade Vanilla Extract, E.A.T. #21 and The Need to Make Stuff

dsc_0409

Pure Vanilla Extract is one of the simplest & most appreciated gifts to give cooks. Bulk vanilla beans can be purchased online easily these days and combined with a good bottle or two of vodka or bourbon you have everything you need to make multiple bottles of richly flavorful Vanilla Extract is just a few weeks.

dsc_0294

I have been thinking about why I like to make things a lot lately. As a child I made things with my hands all the time…little pieces of art or make-believe foods from mud, grass and sicks…pot holders and paint-by-numbers..my hands always busy and engaged.

I am like that to this day. I am pretty sure it is because the act of making  stuff is something I can control in a world where so much is absolutely, insanely out-ot-control.  When my hands and mind are engaged in a project I am more at peace and able to sort through my thoughts in a more calm manner. At the end of the process I have something to show for this time spent. An art piece, a cake or loaf of bread, a bottle of pure vanilla extract. Making stuff to share. We all have to find our way do we not? What is your method?

dsc_0299

I split the beans…about 25 or so and add them to 6 cups vodka or bourbon. Add a tight-fitting lid and wait…..a small lesson in patience…..

dsc_0308

….in  a few weeks (2 to 4) you’ll have lots of pure vanilla extract. I keep my jar in a closet and shake it every few days to help release the vanilla bean seeds….week by week the color darkens to a deep amber.

dsc_0288

I add a few of the vanilla beans to each bottle after I decant the extract. The vanilla flavor will just keep getting better.

dsc_0412

Make stuff, share stuff….it’s as easy-as-this.

Homemade Vanilla Extract

  • Difficulty: easy
  • Print

dsc_0412

Ingredients:

  • 6 cups good Vodka or Bourbon
  • 25 vanilla beans, split
  • 1 large glass jar with tight-fitting lid
  • various decorative bottles with tight-fitting lids for decanting extract

Directions:

  1. Pour 6 cups vodka/Bourbon into a large glass jar.
  2. Add split vanilla beans. Top with lid and shake.
  3. Keep in a dark closet or cabinet for 2 to 4 weeks, shaking jar every few days.
  4. Decant into decorative bottles. Add a few of the split beans to each bottle. Add tops and your ready to give away as gifts to your friends who love to bake. Bon Apetit!

Teresa Blackburn          www.teresablackburnfoodstyling.com      www.foodonfifth.com

Spicy Pickled Grapes (the New Olive) for Your Holiday Cheese Plate – E.A.T #20

dsc_0360

You know how you hear about something that is so easy you wonder why you never thought of it? This happens to me all the time. “Pickled Grapes” is one of those things. I first heard about them on two different NPR programs within one week. Touted as the “new olive” for a cheese plate I was so intrigued I had to see for myself. The how-to is child’s play for the novice or seasoned cook. The finished cold, crisp, spicy pickled grapes are divine served with a few well-chosen cheeses for a Holiday cheese platter. It is all as “easy-as-this”.

dsc_0370

Gather a few clean, dry pint size glass jars with lids…seedless grapes…a few spices & vinegar and your ready to go.

dsc_0383

Grapes rinsed & drained then packed into jars and covered with hot, spicy vinegar mix…cooled to room temp, lids added and then jars chilled….ready to eat. 30 minutes start to finish! They will keep in refrigerator for a few weeks. Good food gifts for friends who don’t like olives as well.

dsc_0374

Some suggested cheeses – Point Reyes Blue Cheese, Raclette 5 Peppercorns, Reypemaer Gouda. All have a unique flavor and texture and are complimented by the “new olive”…the ‘pickled grape”! It’s as “easy-as-this”.

Pickled Grapes

  • Difficulty: veryeasy
  • Print

dsc_0374

Ingredients:

  • Seedless Grapes – Red and/or Green, rinsed & drained, pulled from stems, enough to fill 4 or five jars – 6 cups?
  • 2 1/2 cups white wine vinegar
  • 3 garlic gloves crushed and then minced
  • 2 tablespoons sea salt
  • 2 teaspoons sugar
  • 2 tablespoons rosemary leaves from fresh stems + a few extra stems for jars
  • 1 to 2 teaspoons crushed red chili pepper flakes

Directions:

  1. Fill glass jars with grapes.
  2. Bring wine vinegar, garlic, sea salt, sugar, rosemary leaves & red pepper flakes to a low boil and then turn to simmer, stirring for a few minutes to dissolve salt & sugar. Remove from heat. Stir in a few rosemary sprigs.
  3. Immediately pour hot mixture over grapes in jars. Nestle sprigs of rosemary down into jars
  4. Loosely cover jars and let cool to room temperature. Then cover with tight-fitting lids and store in refrigerator until ready to use. You can eat within an hour or keep for up to a few weeks in the refrigerator.
  5. These are amazing and refreshing and everything delicious to serve with cheese & crackers or toss in a salad.

Notes: Other ideas to try when making the next batch…fresh thyme sprigs, red wine vinegar, whole garlic cloves…I bet you have some of your own ideas.

Based on recipes jotted down while listening to NPR shows.

Teresa Blackburn    www.teresablackburnfoodstyling.com

” November Pear-Pluot Tart” (When the going gets tough, the tough start baking!)

dsc_0292

In my house when the going gets a bit tough, I have an overwhelming urge to bake and bake and bake…the next few posts might be baked goods.

Lovely firm pears…juicy pluots…maple syrup and spelt flour all layered, sugared and baked in a short bread crust. Hello November….Hello Thanksgiving in Nashville, Tennessee….Hello?

dsc_0324

Below are step-by-steps….just in case….

dsc_0307dsc_0309

dsc_0313dsc_0315

…..you want to make your own…right now…today..don’t you? It’s as Easy As This! Baking will make you feel better….I promise.

dsc_0337

Hello delicious.

November Pear-Pluot Tart

  • Difficulty: easy
  • Print

dsc_0327

Ingredients for Crust:

  • 2 cups spelt flour
  • 1 stick cold butter cut into pieces
  • 1 teaspoon vanilla bean powder
  • 1/4 cup maple syrup
  • 1 egg yolk
  • 1 tablespoon ice cole water, if needed

Ingredients for Filling:

  • 2 tablespoons red currant jelly, melted to brush on crust
  • 3 ripe, but firm pears, cored, peeled and thickly sliced
  • 3 pluots or plums, cored and thickly sliced (or small tart apples)
  • 1/2 cup demerara or other dark brown sugar
  • 2 tablespoons butter cut into pieces
  • Grainy raw sugar to sprinkle over top of tart after baking

Directions:

  1. Place spelt flour in a food processor along with the butter pieces and vanilla bean powder. Process until mixture looks like breadcrumbs. Add maple syrup and egg yolk. Process until a dough forms. (Add ice water if needed)  Remove dough from food processor and form into a flatten disk. Wrap in plastic and chill for 30 minutes.
  2. Roll dough out onto a lightly floured surface into a large round. Fit into a 9 inch springform pan, folding extra dough to inside to form a thicker crust all around. Prick the bottom of the crust and chill for 30 minutes while you prepare the filling.
  3. Preheat oven to 350 degrees.
  4. When filling ingredients are ready remove tart shell from the refrigerator and spread the bottom with the melted red currant jelly.
  5. Fill tart shell with fruit, and then sprinkle the demerara sugar over the fruit. Top with butter pieces.. Bake until fruit is fork tender, not mushy, about 40 minutes. Fruit will begin to caramelize just a bit. Remove from oven and dust with grainy raw sugar. Serve warm or at room temperature with a dollop of whipped cream or vanilla ice cream.

Notes: You can make this tart with all pears or pears and apples as well. Great Holiday dessert.

Teresa Blackburn     http://www.teresablackburnfoodstyling.com

(Almost No Cooking) E.A.T. Late Summer Salad with Crowder Peas, Homegrown Tomatoes & Cucumbers

DSC_0218

 The so-called “dog days of summer” have gotten to me and when it comes to cooking I am giving in. Salads and variations-on-the-salad will be my mainstay for a bit. Cool foods that I can quickly and easily put together with ingredients  that are readily and locally available. I will make foods that do not require breaking a sweat.

This colander of fresh Crowder peas in where we start today. I quickly cooked them in a plastic bag in the microwave…no hot water steaming up the kitchen on this 90+ degree day,  then I rinsed them in cold water and let them drain for a bit.

DSC_0203

Hmmmm….homegrown tomatoes & cucumbers from the Duren-Kemp garden of earthly delights. (That’s my son-in-law and daughter’s garden.)

DSC_0204

A splash or two or three of this fab balsamic vinegar purchased down the street from Lazzaroli’s Pasta emporium.

DSC_0227

Easy as this Lemon Salt  & freshly ground black pepper added to taste… served with glass of chilled white wine and a baguette from Dozen’s Bakery.

DSC_0216

 A late summer, no oven or stove-top dinner, healthy & fresh, cool as a cucumber meal! Keep it simple, don’t work up a sweat with this “Crowder Pea, Homegrown Tomato & Cucumber Salad”. It’s another “E.A.T. ” (easy as this) meal brought to you from my little Food on Fifth kitchen.

DSC_0221

(Almost No Cooking) E.A.T. Late Summer Salad of Crowder Peas, Homegrown Tomatoes and Cucumbers

  • Servings: 6
  • Difficulty: E.A.T. (Easy as This)
  • Print

DSC_0216DSC_0218

Ingredients:

  • 2-3 cups fresh, shelled Crowder peas, lady peas or any other summer pea
  • 4 medium size home-grown tomatoes cut into bite-size chunks
  • 1-2 fresh smallish size cucumbers, peeled or unpeeled, sliced or cut into chunks
  • a good balsamic vinegar, as much as you like to coat
  • lemon salt & freshly ground black pepper (or just regular sea salt)

Directions:

  1. Rinse & drain peas & put in a zip-lock bag left slightly open. Cook in microwave for about 8 minutes on high. Dump into a colander and rinse with cool running water. Leave to drain for 10 minutes.
  2. In a large bowl toss together the cooled peas, tomato chunks & cucumbers.
  3. Season with salt & black pepper. Drizzle with balsamic vinegar to taste. Serve at room temp or chilled. Delicious with a crusty baguette and, of course on a hot day, a glass of chilled white wine. Bon Appetite.

Teresa Blackburn   teresablackburnfoodstyling.com    foodonfifth.com

New-Classic Iceberg Lettuce Wedge Salad with Blue Cheese Ice Cream Dressing

DSC_0184

Today’s temperature in Nashville, Tennessee as I post this at 6:34pm CST:      94 degrees and feels like 104 degrees (official report!). Let’s eat something cold, really cold like a chilled iceberg wedge with a frozen blue cheese dressing.

A cold blast-from-the-past with an updated twist.

DSC_0149

As you know blue-cheese dressing is a must for this salad, but frozen blue-cheese ice cream dressing is even better!

I had a version of this salad while working on a photo shoot in Florida a few years ago. It was late in the day, I was hot & tired. I walked to a nearby restaurant close to my hotel for dinner at the end of the day. I lazily chose the “classic wedge salad” and when it arrived at my table the dressing was frozen….a blue-cheese ice cream dressing right on the top of my wedge slowly melting down into & between the leaves. Ingenious.

DSC_0156

A good blue cheese with lots of veins….yogurt…hot sauce…my homemade lemon-salt and…….

DSC_0155

….a generous grinding of my friend Jesse (Food Sheriff) Goldstein’s very own invention “Flower Pepper”. To be more exact “Uncle Daisy’s Organic Flower Pepper”. Jesse gave me a jar of his special pepper chock full of dried flowers as a gift and it added just the right flavor to this recipe.  It is not available in stores but you can make your own. Go to Jesse’s blog post that tells you how.

DSC_0158

Ingredients blended together and frozen in my ice-cream freezer but left a bit soft to scoop onto the top of the wedge!

DSC_0190

Pancetta cooked until very crisp and most of the fat rendered in my Lodge cast iron skillet.

DSC_0163

Updated….Neo-Classic Iceberg Wedge Salad…for hot days to cool you down.

DSC_0178

Neo-Classic Iceberg Lettuce Wedge Salad with Blue Cheese Ice Cream Dressing

  • Difficulty: easy
  • Print

DSC_0178

Ingredients & Equipment:

Electric ice cream freezer ready to make ice cream according to package directions for your particular machine.

Directions:

  1. In a bowl mix together Greek yogurt, blue cheese crumbles, a healthy pinch of lemon salt, a generous grinding of Flower Pepper and a few shakes of hot sauce to taste. Stir until well blended.
  2. Scrape mixture into the ice cream freezer and freeze according to package directions or until mixture is “ice cream frozen”. Scrape blue cheese ice cream dressing in a plastic container and pop in the refrigerator freezer while you prepare the salads. Don’t let the dressing get too frozen as it will be hard to scoop.
  3. On four plates place one Iceberg Lettuce wedge. Sprinkle tomato halves & crisp pancetta over the wedges.
  4. Add a scoop (or two) of Blue Cheese Ice Cream Dressing over each wedge right before serving.

Teresa Blackburn    teresablackburnfoodstyling.com